INGREDIENTS
- 2 1/2 cups all-purpose flour
- 3/4 cup warm milk ( i used fresh milk)
- 2 1/2 tsp. instant yeast ( i used 2 1/4 tsp)
- 2 tbsp. warm water
- 2 1/2 tbsp. melted butter
- 1/2 tsp. salt
- 1/4 cup sugar
- 1/2 tsp. vanilla essence (or you can use cinnamon/nutmeg)
- 1 egg, lightly beaten
INGREDIENTS
- Have an extra quarter cup of flour handy in case the flour gets too sticky you can sprinkle some more a little at a time.
For the Donuts
- Add the yeast to the warm water in a small bowl, cover and set aside for about 5-10 minutes.
- In the meantime sift the flour. Add the salt and sugar. Stir with a whisk just to combine everything properly. Once the yeast has proofed/become activated (it will have swollen up and become bubbly in the water), add it to the flour.
- Now add the melted butter, beaten egg and the warm milk. Stir everything together and knead to form a sticky dough. You can use the hook attachment if you’re using a machine, otherwise you can just do this by hand. Remember, you want the dough a little bit sticky. So if it’s tooo sticky to handle, dust a bit of flour or oil your hands lightly and knead, but try not to get it too firm as that will not give you light and soft doughnuts. Knead for about 4-5 minutes, then turn the dough into a lightly greased bowl and cover with cling film. Set aside for about an hour or until the dough doubles in volume.
- If you are kneading the dough at night and want the doughnuts for the following day, after kneading the dough and putting it in a bowl, cover with cling film and refrigerate. The dough will slowly rise in the refrigerator, and the next day you can just proceed to shape and fry your doughnuts. DO NOT cover with aluminum foil.
- Once risen, knock the air out of the dough, turn it out on your work surface and roll out to a little under a half inch thickness. Cut out your doughnuts and set them aside on a floured surface or tray. Keep the doughnuts covered with a light kitchen towel.
- Bunch together all the scraps of dough and keep forming doughnuts until all the dough is used up.
- Let the shaped doughnuts rest and rise for about another hour.
- Heat your oil. If you have a kitchen thermometer, get the oil to about 170-180 C. This is the ideal temperature for frying doughnuts.
- Fry the doughnuts, maintaining the heat on medium. If the oil gets too hot, the doughnuts will color too quickly and remain doughy in the center. Drain on a rack until all the doughnuts are fried.
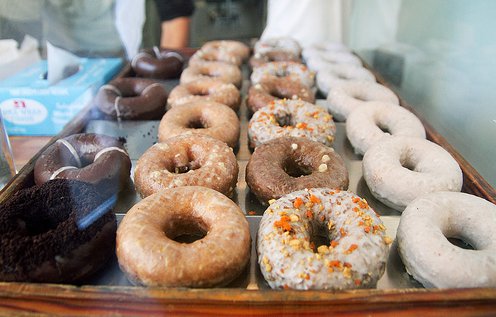
- Once they’ve cooled, you can glaze or sugar-coat them according to your preference. Here are the glaze recipes I used.
Instructions for the Glaze
- For sugar glaze, measure out 1 cup of icing sugar, add a few drops of vanilla essence to it, then gradually add warm milk or water a tsp. at a time and mix until it becomes smooth and of a thin consistency. Make this right when you are about to dip the doughnuts as the glaze will set as it dries on the doughnuts.
- For chocolate glaze, I just melted cadbury’s milk chocolate, added 1 tsp. butter to give it a shine and a tiny pinch of salt to add depth of flavor to the chocolate. Then dip the doughnuts one at a time and place them on a rack until the chocolate sets. If you want, you can add sprinkles or whatever toppings you like before the chocolate sets.
- Otherwise you can dust some icing sugar on the doughnuts or even just serve them plain, or top them with some warm jam. Anything you like!
Enjoy!
Credits to: Fauzias Kitchen
Via:Marisa and Rochel


